Tuesday, March 20, 2012

Chocolate Chip Peanut Butter Banana Cupcakes

Yes, the recipe name is a mouthful, but after you make these cupcakes there will be no complaint! I just found a recipe for peanut butter c.c. cupcakes and thought, I can probably add banana to that and it would be good! Well folks, it is more than good! It tastes like a cross between a muffin and a cupcake. I will frost a few for dessert and those will be heavenly! & if your household is small like mine, this recipe is really easy to halve! (Makes about 8-9 half or 18-20 full)

You Will Need:
  • 1 cup unbleached all purpose flour
  •  1 tsp baking powder
  •  1/4 tsp salt
  •  6 tbsp unsalted butter, at room temperature
  •   1/2-3/4 cup smooth all natural peanut butter, at room temperature
  •   1-2 bananas, cut
  •   1/2 cup packed dark brown sugar
  •   1/2 cup sugar
  •    2 large eggs
  •    1 tsp vanilla extract
  •    1/2 cup whole milk
  •    1 1/2 -2 cups semi-sweet chocolate chips
Add the butters, sugars and banana (cut in pieces) to the mixer. Mix until smooth.


Add the egg and vanilla to the mixture. Combine.


Now you can add the flour, B. powder, and salt. (I don't usually mix my dry ingredients in a separate bowl, but you can and add them all at once.)


Add the milk to the mixture and mix on low so the milk doesn't splatter.
 

Finally, add the chocolate chips!
 

Fill your cups 3/4 full and put in a 350 degree oven for 20-22 minutes.
 

They don't need frosting, but it is for dessert so what the heck! So good!

Sunday, March 18, 2012

Crock Pot Buffalo Chicken

I found this recipe from a fellow blogger!  I LOVE buffalo chicken and I love making meals in the crock pot. It makes my life so much easier around dinner time. Plus you can use frozen chicken in it.

You will need:
  • 2-3 lbs boneless skinless chicken FROZEN breast
  • 1 bottle Franks Hot Sauce
  • 1 pkt Ranch (or equivalent seasonings)
  • 2 tbsp butter
* I would recommend not freezing styrofoam packaged chicken. Hacked it up to get it frozen out of the package. The 1st time I used the regular frozen bag of SBCB.*  Slowcooker liners are also great!


Place your frozen chicken in the crock pot.


This is my homemade ranch seasoning stash. Pour some of it on the chicken or use a packet of ranch dressing mix.

Pour the whole bottle of hot sauce in! Mmm! Cook on low for 6-7 hours.

Test it around 6 hours, if it is easy to cut (falls apart) then it is done. Shred the chicken.


Steaming hot!


Add 2 tbsp into the sauce and stir. Add the chicken again. Cook on low another hour.


Just a preview of one way we enjoyed it... On pitas with cheese!

Also is great in a wrap with lettuce and ranch! Wanting to try it with melted velvetta and tortillas chips next! 
Enjoy! =)

Homemade Pita Bread

This recipe is quickly going to be a staple in my house! Annie's Eats has a great recipe, but I made a couple small changes to it for mine.

You will need:
  • 1 pkt Active Dry Yeast (1/4 warm water)
  • 3-4 cups flour
  • 1 1/2 tsp salt
  • 1 tbsp honey
  • 1 cup water
  • 2 tbsp olive oil
Here are your ingredients, also water.
 

Run some warm-hot water. The yeast instructions say 110 degrees, so I used water warmer than my body/temp. Use 1/4 cup and add your yeast packet. Let is rise for 10 minutes. It will be foamy and have risen.


Put 3 cups of flour into your bowl. 


Add your 1 1/2 tsp salt and a squirt of honey. Add the 2 tablespoons olive oil and the yeast. Mix these ingredients together.


Now add your water. The original recipe called for more water, but I already had some water in to activate my yeast, so I only used 1 cup.


This part of the recipe depends on if you have a stand mixer or not. If using a mixer, use a dough hook on low and mix for 10 minutes. If not, hand knead the dough for about 10 minutes. 


As it is mixing or as you are kneading, keep adding flour until the dough pulls off the edge of the bowl or until it isn't sticky. I added a lot of those small scoops of flour, so don't be nervous. Just keep adding until it is forming a ball.


 When the dough has formed a ball, grease a bowl and rolls the dough around so it is coated. Cover with plastic wrap and let rise 90 minutes. It should be almost doubled in size.


Punch down the dough and divide it into 8 individual balls. Cover with a damp towel and let rise another 20 minutes.
 

Preheat the oven to 450 degrees. You need to warm up a pizza stone or large cookie sheet with the oven, while it preheats.  After the 20 min. rise time stretch/roll the dough into circles.


They won't be perfectly shaped, but they will taste great! 


Place the pita dough on the heated stone/pan and bake for 3-5 minutes. When they start to puff up they are done. Watch them, you don't want them to get too crispy!

Like I said, I LOVE THESE! They take a little pre-prep time, but they are worth it! These 8 will last us about a week depending on what we eat! So far I have made gyros with them, heated with cheese on top, and made indiv. buffalo chicken pizzas on them! =)  ENJOY!

Wednesday, March 14, 2012

Homemade Tile Coasters

This project was super easy! I think it took the husband and I longer to pick out the tiles than it did for me to put the coasters together.
You will need:
  • Tile coasters of your choice
  • Non-Slip drawer & shelf liner
  • Hot glue gun & glue

 -Start with your coaster. We choose ones that had a more 'finished' edge instead of just a flat cut edge. They looked like coasters before we even began!

-Cut pieces of the drawer liner to roughly the size of the tile, or a little smaller.

-Warm up your hot glue gun and run a glue strip on the inside of the tile and then one along the outside. Place the liner onto the glue. Let dry upside down (liner up). Repeat with other coasters

-Once it is dry, they are ready to use! Not only do they not slip on our tables, they look great!

**If you want to get fancy, you can get plain tiles and use scrapbook paper squares to dress them up. Use a layer of Modge Podge under the paper and on top of it. Let dry before using!


See, super easy and beautiful coasters! Enjoy!

Monday, March 12, 2012

Mini Donuts

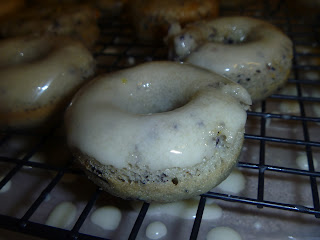
There isn't a real recipe/photo tutorial with this post. I just recently got a mini donut pan! I love donuts, even though fried are a bit better than baked. But I gave the pan a try. Here is the recipe I used.  These donuts were very good, but a little too orange-y and not enough blueberry, which is what I was going for. They were a good first try though! I can't wait to make some more in it!  Just took a few photos to show how yummy they were!

Take your donuts, cooled from the pan..

Dip the top into the glaze


Look at how pretty it is!


Mmm!


Chocolate Chip Cake Mix Cookies

These cookies are even easier than the last Cake Mix Cookies recipe I made. Of course you don't need to use cookie cutters, I just had fun making shaped cookies today.

You will need:
-1 box cake mix (used yellow)
-1/2 cup veg. oil
-2 eggs
-flour
*Chocolate chips/m&m's optional

Mix together all your ingredients until a dough forms. I added a little flour to these to make them a little less sticky. If you want add chocolate chips and m&m's. Or sprinkles!

 Sprinkle some flour on a flat surface and work the dough flat, making sure it isn't sticking to the surface. Using your choice cookie cutters.

Press, wiggle a bit...

And pull off. Place your cookies into a greased pan and into a 350 degree oven. They cook 5-10 minutes. 

I didn't actually set a timer, I just pulled them out when they turned golden brown on the edges.

I liked this one, looked like he was waving!

And there you go! A cake batter/chocolate chip cookie! Enjoy!