Friday, August 30, 2013

Wonderful Uses for Basic Oils

I hope that my past few posts have at least gotten you thinking about what essential oils can do for you and your family. In this post I want to share with you some everyday ways to use some basic and popular oils- Lemon, Lavender, and Peppermint.

If you want to start using essential oils this is the place to start.

Lavender is extremely versatile from promoting calming sleep to disinfecting cuts and scrapes. Lavender has anti-depressant, anti-fungal, anti-inflammatory, and antimicrobial properties.

Peppermint is popular not only because it is recognized from candies, but it has abilities to ease stomach discomfort and boost mood.

Lemon has anti-depressant, antiseptic, antiviral, and anti-fungal properties. It also works great for a natural cleaning alternative. It can be used to ease scratchy throats or de-gunk sticky messes.

Attached is a document I made with a list of great uses for the three basic essential oils. doTERRA offers two packages based around these basic oils. The first is The Introductory Kit with 5ml of each oil and an Intro CD. The second is the Beginner's Trio which has each oil in a 15ml size.

I will be honest and I have only had my oil kit for about 6 weeks and I have already exhausted my 5ml Lemon oil and 5ml Lavender oil. These oils are so useful and I am excited to get my next order in the mail, containing my 15ml bottles! These will go a lot farther for our medicine cabinet!

Easy Oil Uses


Lavender has antidepressant, anti-fungal, anti-inflammatory, antimicrobial, and anti-toxic properties - See more at: http://doterrablog.com/101-uses-for-the-intro-kit-part-13-lavender#sthash.zrSuZms4.dpu
Lavender has antidepressant, anti-fungal, anti-inflammatory, antimicrobial, and anti-toxic properties - See more at: http://doterrablog.com/101-uses-for-the-intro-kit-part-13-lavender#sthash.zrSuZms4.dpuf

Tuesday, August 27, 2013

Getting Started Essential Oils

I am working on getting more people introduced to using essential oils in their everyday lives. In the past few days I have given friends samples and my husband is actually asking me to fix him up with appropriate oils. I am making strides in the right direction, although still using friends and internet guidance. I am learning as I go though. Thinking about make a print-out or file with all the information I am gathering!

Well since I am getting you interested in the idea and letting you see how it works for yourself, I guess I should come out there and tell you I am a seller with doTERRA. I didn't want to lead with that and I am not into being pushy. That is the reason I have lasted not selling pampered chef, or avon etc. I feel awkward selling stuff to people.

But seeing is believing, and if you see how well the oils work for you, then they kind of sell themselves! That is how I got hooked anyway!

My husband is still trying to trust in these oils to help him, and I am honestly still the tiniest bit skeptical, but the more I use them, the more they help me. It is worth a try.

Check back with me for a list of websites to check out great uses for doTERRA essential oils.

Monday, August 26, 2013

Essential Oils pt. 2

I am hoping that with my first post on essential oils I got you to do some thinking. Now I want to share some of the ways the oils have helped me.

  • Lavender: I use lavender almost every night before bed. I like to rub a little bit on my shoulders/back and on my pillow. The scent naturally helps you relax and I get better sleep when I use it. Lavender is also good for soothing bug bites, relaxing children before bed, to remove splinters and much more.
  • Peppermint: The main thing I like this for is nausea. Hubby and I drove to Vegas when I first got oils to use. I get very carsick and that was happening. I took off the lid and just smelled the bottle a couples times as needed and it kept my upset tummy at bay. Peppermint is also good for a pick-me-up, calming headaches and keeping spiders away.
  • OnGuard: This is the name for the blend by doTERRA but it is commonly known as Thieves. In the ages of the plague, thieves would use this blend of oils to keep from getting sick when robbing plague victims. I have a special love for this blend. I have been putting on my feet every morning (give or take a few) for over a month. Not a sniffle. And I work with children that are coughing, sneezing, runny nose machines. And I am usually always caught with a cold. I believe in this stuff.
  • DigestZen: This is another doTERRA blend. It is made to help with any digestive issues. I have used this a few times with good results and also seen good results using it on a 5mo baby. 

Here are some of the blends I have put into roller bottles for easy access... OnGuard: to roll on bottom of feet every morning. Lavender and Peppermint to roll on feet to relax before bed. Eucalyptus and Spearmint because I like the scent. And Digestzen for easy access. All of these are also mixed with carrier oils to make it go farther. I have also made an allergy blend in a roller, a mixture of fractionated coconut oil, lemon, peppermint, and lavender. My friend is liking it so far. 

I want to keep you all updated on how the oils work for me and would love to hear your thoughts!
There is still a lot more to the whole EO thing, but I can't sum it all up in two posts. More coming.
 
Again is you want to try the oils or have any questions, please don't hesitate to ask! :)


Essential Oils pt. 1

So I have been trying to get up the nerve to write this post for a few weeks now.  Living here in California is a whole new thing for Hubby and I, being from the midwest. A lot of things are done differently here being in CA and on a military base. Words like home birth, home-school, organic, and farmer's markets come to mind. I have enjoyed learning about all of these things in our time here.

Anyways...Here goes, I have started using Essential Oils. (Did I mention my husband lovingly refers to it as witch magic) I am sure you have heard of essential oils in some context, whether it be cooking, bath and body products, etc. I first got introduced to the idea when a friend was hosting a doTERRA party (a company specializing in essential oils). I couldn't make it to the party but started to wonder what was the deal with these EO's.  Next a friend and her husband had gotten pretty sick and the friend used some oils to clear her sickness right up. Way faster than the husband on "American" medicine. I was really intrigued. At this point, I sat down with some other friends who had been using EO's and got a little lesson about them. I got some samples a couple weeks later and here I am.


The basic run-down on EO's is as follows:
  • There are not official grades of EO"s but here is a general outline:
    • Perfume: such as in bath and body products
    • Food: what you might buy at local store
    • Therapeutic: The oils I use, safe for body
  • Because of the different grades, be cautious when buying oils to use on your body. I use doTERRA and their oils are tested to be used aromatically, topically, and internally.
  • Essential Oil's absorb quickly into the skin, especially the skin on the bottoms of your feet. You can also use a carrier oil for strong oils or with oils on younger/sensitive skin. I use coconut oil and sweet almond oil as my carriers. Olive oil also works well.
  • Most essential oils are high in antibacterial, antifungal, and antiviral properties.
  • Essential Oils work in your body at the cellular level

If you are interested in trying some essential oils or more information please message me and I will help you the best I can or find someone who can!


Tuesday, February 26, 2013

Grilled Breakfast Sandwich

In our house we are huge fans of grilled cheese and cheese tortillas (or what normal people call quesadillas). Super easy, but still tasty enough for us! Well this recipe is pinterest inspired, but only by a photo I winged the recipe.

You will need:
-Bread
-Butter
-Cream cheese
-Honey (optional)
-Fruit
-Jam or Jelly

I would recommend cream cheese spread like for bagels, but we had a block of cream cheese and Hubby likes it anyways, so no big deal. I added a little honey for sweetness with the C.C.


Spread on the jam and the fruit. I used homemade strawberry jam and blueberries.


Cook as you would the regular grilled cheese. I finished ours in the toaster oven for 30 sec-1 minute to make sure the cream cheese was melted along with the bread being toasted.

Now doesn't that look delicious?


Monday, January 21, 2013

Whole Wheat Apple Pie!

This pie was super easy to make! Back in September, we went to Julian apple picking with some friends. We brought home lots of apples and were not in the mood to eat them all. I did some googling and found a recipe to make apple pie filling to freeze.

The recipe is pretty straight forward. I am sure you could sub out some of the sugar for honey and use less water. I definitely halved or quartered this recipe because I didn't have 6-7 lbs of apples, but you get the idea.  The author also says this recipe will last up to a year in the freezer! I have also made Apple Crisp Pizza with my frozen pie filling and it was delicious!

So we were celebrating one of our friends birthdays and I decided an apple pie would be a perfect 'birthday cake'.  I pulled out one of my frozen apple pie fillings that morning and let in thaw on the counter/fridge until about 3pm when I starting baking.

Adapted from:
Whole Wheat Pie Crust
  • 2 1/2 c whole wheat flour
  • 1 tsp salt
  • 2 tbs sugar
  • 1/2 c Coconut Oil
  • 1 1/2 sticks of butter (12 tbs)
  • ~1/4 c vodka
  • ~1/4 c water
Don't let the vodka scare you. I did a little research and it is legitimate and makes for a flakey crust.

Mix together the dry ingredients and cut in the butter and coconut oil. I don't have a pastry cutter, so I just used my hands. Mix it in well. I will be slightly crumbly. Now add the vodka and water and stir with a spatula. I used just under 1/4 cup of each. The dough will be wet! I promise it all turns out okay. Split in half and refrigerate in baggies or container for at least a half an hour.

After it has chilled, use two pieces of plastic wrap and roll out the dough between it. You want it just bigger than the pie pan.  Press into a greased pie pan. Pour the filling into the pie. Mine was still cold. Roll out the second ball into the same shape and cut into slices for the lattice top. Weave it on top and you are ready for the oven. Bake @ 350 degrees for 45-55 minutes.

Serve warm with ice cream and caramel if you are feeling adventurous!

I want to make the blueberry pie on the crust website. Has anyone ever had or made a blueberry pie? What did you think?

Enjoy!

Saturday, January 5, 2013

A Healthier Me

I debated whether to put this post up more privately on my other Blogger, but I think since it is about food and health, it can fit in just fine here.

So anyone who knows me well, knows I don't usually watch what foods I eat and don't work out. Since my husband and I have moved to CA both of these things have been challenged a lot more than I expected. There is a huge availability of fresh fruits and vegetables here, not to mention the big introduction (to me anyways) of organic foods.

In my house, growing up, I think we had a balanced enough diet, especially being that I was growing up and it was okay to gain weight as I went. We usually had a vegetable with dinner and shoved some fruits in. I ran throughout high school and that was a savior in the way my body looked and felt. However in college the typical happened. We ran to quick and easy foods and that was definitely not what we should have been eating.

 But the point is I am trying to make a change in the way I eat and live my life. I know it will be slowly and I am not looking to jump into this all at once. I have a feeling I won't ever be able to cut sugars or carbs completely out of my diet. I am from a good ole' midwest family and I am Italian. You mess with my pasta, I mess with you ;). I am not looking (yet anyways) to change the whole way I cook, bake and eat, but I want to make a start by adding in veggies, fruits and healthier recipes overall!

So I went to the grocery store yesterday and came home with lots of fruits, veggies, greek yogurt, almond milk, chicken, good snacks and yes, a bag of sugar. (I just can't do it people!)  I spent a good amount of time prepping the food and will spend some more time today. I don't want any excuses for not being able to eat healthy on a time crunch!


 So I gathered my fruits and veggies for smoothies. I love my green smoothie (spinach, pineapple, banana and apple or pineapple juice).
I wouldn't usually get frozen fruit, but the commissary didn't have good prices on fresh strawberries so I opted out. The frozen packs are nice though because they have a variety of fruit and also a 'smoothie' powder pack, which I wasn't going to use but it made my green smoothie so good!  But yeah, I chopped up the pineapple, banana and spinach and let it individually freeze before bagging it.

I think I made 6-8 smoothies bags. I like my fruit frozen and add either juice or milk to mix it, because I hate a 'warm' or thin smoothie. I like it thick and cold!

I also pre-chopped and mixed up a salad. I bought 3 bundles of fresh spinach and a bundle of lettuce greens. This salad bowl is only a small portion. The photo is actually what I still have left of greens. In the salad I have greens, some broccoli, green pepper, and shredded carrot.

I also made some healthy, sweet snack for breakfast or anytime. 
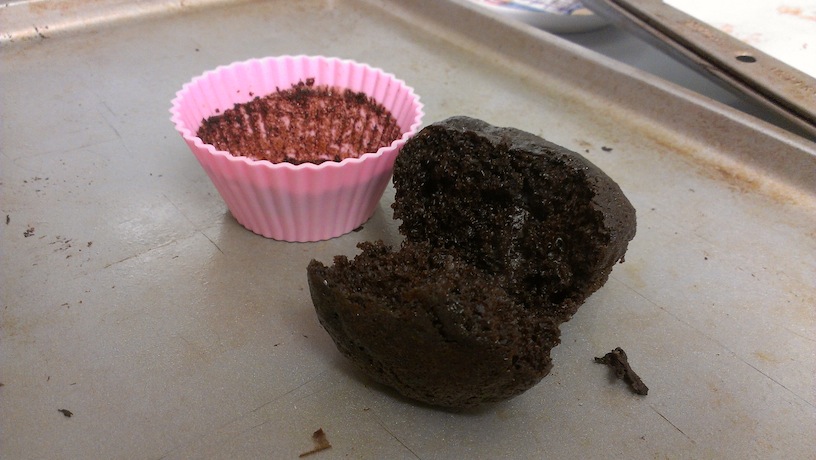
Mocha Chocolate Bites and Chocolate Chip PB Bites. Both are no back. I really love the PB ones but I love that the mocha ones have coconut oil. I bought some dates and pistachios to throw in and I think I am going to make up my own version. Since they are no bake, you just need the right consistency to hold them together and taste good :)

One last new thing I am doing is starting to train for a 5k. And you can laugh, I do a little bit. I did a 5k in November and did run most of it, but I was dying! I signed up for one at the end of March with a friend and we are both trying to actually train up to it and be prepared. Plus, what a better excuse to start getting into shape and working out again. This is the basic plan I am following. And we have more than 8-9 weeks til the race, so I am taking it slow and tweaking it to my fitness level. (Which I don't think is fresh from the couch.) The 'training program' is 3 days a week, so I am starting every other day. Thursday=Check!, today= Check! However, I would like to eventually be running everyday.

So thanks for hanging out through that whole post (if you did read it all). I just had a lot to say and share and I want a way to hold myself accountable and share my story! :)


Tuesday, January 1, 2013

Freezing Cupcake Batter

Yes. Genius for us. Only 2 people in our household makes it pretty tough to make a full recipe of any kind, especially sweets. And I can only take so much to work before my coworkers think I am trying t fatten them up. :)

So I did a little research on the internet and found a good page about freezing cupcake batter. I did two of the ways they suggested with this yummy chocolate cupcake recipe.

Mix up your recipe as usual. I actually make 12 of them for last night and froze the rest. But I would also see myself in the near future making yellow cupcakes just for the purpose of freezing. I have become a big fan of freezing lately. I mean who doesn't like a simple thaw and cook meal, snack, etc? I have gotten better about putting stuff in the fridge the night before. That generally helps ;) .

 Anyways, mix your recipe as usual and the first way to freeze them is to scoop them into your cupcake liners as you would normally bake them.
Cover and seal with plastic wrap. I used the sticky cling wrap that seals better than regular. Freeze the cupcakes until solid. I just did overnight.

Now they are ready to come out of the pan and into a freezer bag. I popped the ones out of the silicone and let them freeze a little longer individually before placing them in a bag. They can go back into a silicone or a regular tin for baking. I just didn't want my silicone tied up in the freezer.

 You can let them defrost in the fridge (in a cupcake tin!) or just set on the counter for 10-15 minutes while you preheat the oven. I baked the pink one above in the liner 5 minutes from the freezer and it turned out great. Maybe 1-2 minutes added to cooking time.


-The next way to freeze the batter is to just pour it straight into a freezer bag or freezer safe container. It would be wise to measure out a certain number of cupcakes into a bag, but I had already filled about 20 cupcake liners (paper and silicone) You would just defrost this in the fridge and bake as normal.


Hot Chocolate Frosted Cupcakes with Marshmallow Filling

This recipe isn't mine, at all, but I combined a couple different recipes into this yummy, rich cupcake! I have been on a huge hot chocolate kick lately so this recipe is perfect!

Chocolate Cupcakes
  • 1 1/2 cups Hershey's Special Dark Cocoa Powder (you can also use regular cocoa powder)
  • 3 cups all purpose flour
  • 3 cups granulated sugar
  • 1 Tbsp baking soda
  • 1 1/2 tsp baking powder
  • 1 tsp salt
  • 3 eggs
  • 1 1/2 cups buttermilk
  • 1 1/2 cups warm water
  • 3/4 cup vegetable oil
  • 2 tsp vanilla extract
Love these square silicon liners David's mom got me.
Mix (or sift) the dry ingredients into a large mixing bowl. It did fit in my kitchen aid, but it was close. Add the eggs one at a time and then the rest of the wet ingredients, slowly! Make sure you scrape down the bowl. Mix for two minutes on medium/low. The batter will be really thin. I was worried I messed up the recipe, but they turned out perfectly.  Fill cupcake liners 2/3 full and bake at 350 for 20 minutes.


Marshmallow Filling
  • 1/2 cup (1 stick) unsalted butter, softened
  • 7.5 oz Marshmallow Cream
  • 3 Tablespoons heavy/whipping cream
  • 2 cups powdered/confectioners sugar
  • 2 teaspoons vanilla extract  
I whipped this up while the cupcakes were baking. Cream the butter and add the marshmallow creme and whipping cream. Slowly add the powdered sugar and beat until combined. Finally add in the vanilla.


After the cupcakes have cooled (some if you are impatient like me), its time to core them for the filling. I have an actual cupcake corer that my mom got me. You push in the serrated edge and twist a bit until you can pull out the core. You can also use a knife and cut out a small bit. Hubby had fun eating the core pieces.  Next pipe in the filling. You can spoon it in, but a piping bag/tip would be much easier and less messy.


Hot Chocolate Frosting
  • 1/2 cup butter, room temperature
  • 1/2 cup dry hot chocolate mix (without mini marshmallows)
  • 1/3 cup + 1 Tbsp heavy cream 
  • 4 cups powdered sugar
Start by heating the heavy whipping cream and the hot chocolate mix on the stove over medium-high heat. Whisk it together. It needs to be steaming hot but not boiling. The whole point of heating it is to make a thick hot chocolate and have the sugars dissolve.

While it is heating, cream the butter. Add in the chocolate mix and combine. Then, slowly add the powdered sugar and whip until fluffy. Be sure the scrape down the sides before calling it good.

Now, I did try to use a piping bag and tip to ice these, but I let the frosting cool in the fridge and it was too thick, where as my icing tip was too small. I squeezed out what I could onto the cakes and spread it with a knife so that I didn't mess up the filling in the process.

 Next time I will use a 1M Star Tip or my favorite a 1M Round Tip.

Dip the tops in sprinkles or Mallow Bits and serve!

And I actually tried one today (2nd day) and they were still delicious. The cupcakes were super moist because of the filling!

Enjoy!