Monday, November 7, 2011

My Chili

From my experience, everyone makes chili their own special way. Here is how I make chili, shaped by David and my mom! =) This recipe would feed 4-6 people. For us 2, we still can get 2+ meals out of it!
You will need: 1 lb of hamburger, 2 cans of tomato sauce, 1 or 2 cans of crushed/diced tomatoes, 1 or 2 cans of beans (pinto, black etc), 1 envelope taco seasoning, jalapenos, fresh onion, and garlic. Top with cheese, fritos, or whatever you please!

Brown your lb of hamburger, drain and (if you like) ass in jalapenos. David likes his spicy!


Add the taco seasoning the the hamburger meat and mix. Also add 1/4-1/2 a medium onion, and a clove or 2 of garlic. Garlic powder would also be good.


Add the tomato sauce, tomatoes, beans, onion and garlic. I used about half each can of beans, but if you like them, use all of both. I also added more jalapenos and some hot sauce. ;) Bring to a boil, then reduce to low, cover and let simmer for 30 minutes to 2 hours. Be sure to stir occasionally. Top with lots of cheese and enjoy!

*I didn't have any, but I like to add a little beer to it before simmering. Learned this from my family and it gives it a great flavor!*

Buffalo Chicken Wraps

I threw this recipe together one night. We had extra chicken and this is pretty easy!
You'll need: about 1/2 pound chicken (I used breast), about 3 tablespoon butter, fresh garlic, your favorite hot sauce, tortillas, cheese, lettuce and whatever toppings you enjoy!

I cut up the chicken into smaller chunks and put it in a heated, oiled pan. Cut your butter and start melting it in a sauce pan for the buffalo sauce. Prep your garlic.


Mince or use a garlic press to smash the garlic. Place this in the melted butter. Let the garlic saute a few minutes. Add hot sauce to the butter/garlic. I added quite a bit. Just add some, and taste. If you need to add more, keep tasting =). By the way, we love Texas Pete hot sauce! It is super cheap and awesomely good!


When the chicken is done cooking, shred it in the pan and keep on low to keep warm. When the buffalo sauce is where you like it, add to the chicken. Heat on low for a couple minutes. Enjoy in tortillas with lettuce, cheese, ranch, and anything else you have around! =)


Cheesy Chicken Simmer

This recipe actually came from Kraft Recipes. It was too delicious not to share!
You will need: a little bit of oil, 2 chicken breasts (1lb), 8-10oz velvetta cheese, 10-12 oz frozen broccoli, 1 can cream of chicken soup, and 2 cups cooked white rice.

Start with your oil and heat it in the pan. Start cooking your chicken breasts on medium to medium-high. While these cook, poke several holes in the broccoli bag. Place on a plate, microwave for 5 minutes.


Flip the broccoli, and cook another 4 minutes. Flip the chicken also. I actually cit the breasts in half horizontally, they were just so thick! Let the broccoli sit for 3 minutes and then cut it in the bag.


Cut the velvetta into cubes and place in a pan (I used the same pan as the chicken) and add the cream of chicken soup, WITH NO WATER. Mix and let simmer for on medium for 5 minutes. Add the broccoli and simmer another 2. 

Serve with the chicken over cooked white rice. Mmm. Also, the cheesy broccoli mixture and the rice alone made DELICIOUS leftovers! <3 I want to try this again with broccoli and cauliflower!


Friday, October 28, 2011

Broccoli Cheese Soup & Breadbowls

SO I tried to post this earlier this week, and I guess it didn't work. So I am trying again, because this is a very good recipe to share!

You will need 10oz of frozen broccoli (florets are better), some butter, a medium onion, flour, 16oz half & half, 14oz chicken broth, and velvetta cheese!

 Alright, so I followed the recipe and got the cheaper version of frozen veggies, aka not the steam-n-bag kind. So poke a few holes in the bag. Microwave 5 minutes and then flip and put in for another 4 minutes. Let sit 3 minutes. 


 Melt 3 tbsp of butter. While this is melting, chop your onion. You will need about a 1/4 of a medium onion. A little more would be okay too, it gives great flavor.
 Let the butter and onion saute for a few minutes. Don't let the onion brown though. It will start to smell delicious! Add 1/4 cup of flour and mix well! It will be thick, this is to help the soup.


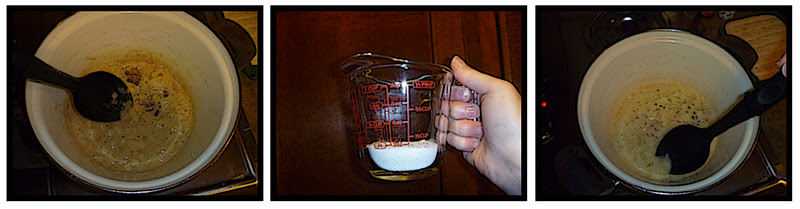
 Now you can add the half & half, chicken broth, and some salt and pepper to season. Stir well. A whisk would be nice. Cut 8oz velvetta (or a little more =] ) and add to the soup. Stir occasionally until the cheese is melted.


 And finally, chop the broccoli and little bit and put it in the soup. Stir and you are ready to eat! Mmm! Queue the breadbowls!


Broccoli-Cheese soup

1 (10 oz) package frozen chopped broccoli

3 tbsp butter

¼ medium onions, finely chopped

¼ cup flour

1 (16 oz) carton half-half cream

1 (14 oz) can chicken broth

1 (8 oz) package cubed velvetta cheese

·      Punch several holes in broccoli package and microwave for 5 minutes. Turn package over and microwave additional 4 minutes. Leave in microwave for 3 minutes

·      In large saucepan, melt butter and sauté onion, but do not brown. Add flour, stir and gradually add cream, chicken broth, ½ tsp salt and ¼ tsp pepper

·      Stir constantly and heat until mixture is slightly thick. Do Not let mixture come to a boil. Add cheese, stir and heat until cheese melts. Add cooked broccoli. Serve piping hot. (6-8)


Breadbowls:
There are 2 ways that I have made them, I will start with the most successful first!
You will need a Loaf, or loaves or frozen bread dough, i used rhodes, and it came with 3 loaves. Each loaf will make 2 or 3 bread bowls. After it defrosts, break a loaf into 2 or 3 pieces and roll into balls. Let them rise as the bag says and bake.  When they are fresh out of the oven, cut the middle out and make sure you don't hit the bottom. Fill with soup and enjoy!
      The second way uses frozen roll dough. It was small pucks of dough. I didn't want to wait the overnight or 2 hours to defrost, so I used the defrost button on my microwave. =)  I used about 6 of the small rolls and made them each into a large round roll. As above, rise, bake, cut and enjoy!


Thursday, October 27, 2011

Cake Mix Cookies


So this recipe should be well-known, but if it is not, I am making it my business to share it. I used Devil's Food Cake and rolled them in powdered sugar instead of granulated sugar. Enjoy the photos and check out the end for the recipe! =)

Here is the line-up. And like I said, try with any flavor, and the powdered sugar is unneeded if you want to roll them in regular sugar!


 Start with your cake mix. You will need 1/3 cup of oil. (I added a tiny bit more, the dough was drier than I wanted)

Add two eggs and 1/4 cup sugar, and 1 teaspoon of vanilla!

Mix it all together with a spoon. It will be thick, but make sure it is all mixed! Stick in the fridge for 15-30 minutes, or if you're impatient like me, the freezer for 5-8 minutes.

Time to get sticky! Use your hands to roll the cookie dough. Roll in powdered sugar and put on greased pan!

Yeah, I currently am using a big-girl easy bake oven =) Thanks Mom! Bake at 350 for 9-11 minutes!

 
Oh man! Check out that powdery, ooey, gooey-ness! I am ready to try some new flavors now! Enjoy!
I have already have 3, and I can't lie...The proof is in the powdered sugar on my shirt.. =)

Ingredients
  • 1 box cake mix (any flavor)
  • 1/3 cup vegetable oil
  • 1 tsp vanilla
  • 2 eggs
  • 1/4 cup sugar
  • powdered sugar
  1. Heat oven to 350°F. In large bowl, mix cake mix, oil, vanilla and eggs with spoon until dough forms. It will be thick.
  2. Refrigerate dough 15 to 30 minutes or as needed for easier handling. Or place in the freezer for 5-8 minutes. Shape dough into 1-inch balls; roll in sugar (regular or powdered). On greased cookie sheets, place balls about 1-2 inches apart. (Mine didn't spread very much)
  3. Bake 9 to 11 minutes or until set. Cool 1 minute on the pan. Let cool completely before storing in airtight container. Enjoy!
**So, I didn't realize that the regular sugar in the recipe was for rolling (that is way too little to roll in) so I put it in the recipe, and I love how mine turned out. So just for your reference, mine have 1/4 cup sugar actually in the recipe and rolled in powdered!)**

Tuesday, September 27, 2011

Another Tuesday Post

Today I have a couple of things to share. First off, check out this awesome blog/website that I follow, Kevin & Amanda! I have been looking for desserts to make while we are without oven for the next few months. I came across this recipe, BEHOLD! If you know me (and David) we LOVE our ice cream.

I read through Amanda's recipe and the majority of the comments from here readers versions. The first time, I made her recipe for Smore's ice cream. It was wonderful around the 2nd day, when it had all set and been mixed well. I am in a hotel right now and do not have access to a mixer, nor did I even have a whisk. I struggled to get the cream whipped up and finally gave up on it. I decided I would try to use what I had in my ice cream. The only mistake I made was not whipping the cream into the SCM and toppings. The cream froze a lot faster and separate from the rest. This was not good. Finally, when it had all froze, it got mostly combined.

Needless to say, I wanted to give myself a second shot at it. I walked around Walmart in a daze trying to decide what flavors to put in it. I finally decided on strawberry and chocolate. I bought strawberry ice cream topping and dark chocolate chips. David helped me whip the cream, but it still wasn't whipped to soft peaks. I put most of the strawberry topping in and about a 3/4 or a cup of the chocolate chips. NOW, differently from the original try, when we added everything together, David whipped all the ingredients until combined. It made a world of difference when it finally froze! David loved it!

I also wanted to share another cute trick I did today in the kitchen... I am truly a child in the fact that I love mac and cheese with hot dogs.  Well I found out today you can boil the pasta and hot dogs at the same time! That's great in my book!

All for now folks!

Tuesday, September 6, 2011

Ice Cream Cake!

I have a new recipe to share with you! This one is all my own. David's birthday was yesterday, and we celebrated it last week. I told him to tell me anything he wanted me to bake/make for him and he said an ice cream cake. Now, let me be clear this cake has NO CAKE in it. Just ice cream and other treats =)

INGREDIENTS:
  • 2 flavors of ice cream [1.5-1.75 qt containers]
  • 1 pkg oreo cookies
  • 1 container Hershey's Chocolate Frosting
  • Candies or cookies of your choice
1. I used a greased 9x13 pan, with a fitted lid (this will help prevent freezer burn).  First you need to crush up the oreos, not too finely. I used about 2/3 of the package. Heat about 1/2 to 2/3 cup of the frosting to semi-liquify it. Mix the frosting in with the oreos to make the crust. Add more frosting if needed. Press the mixture in the bottom of the pan evenly. Freeze this for about an hour or until firm in the bottom.
2.  Now is time for your first layer of ice cream. You could put candy down first, but I put ice cream next on the crust. You will need to sit it in the fridge for 10-15 minutes prior to putting in the pan so it is easy to smooth out. Take most of the ice cream out of the container and into a bowl. Use a spoon to mix it up and make it easier to spread. Use the spoon to scoop and spread the ice cream evenly. Put the lid on and place in the freezer for 2 hours, or until the ice cream layer is firm.
3.  This next layer I had some fun with. You can do whatever candy or flavors you like here. Get creative! I crushed up Reeses Peanut Butter cups (2 bags of the mini-minis) and scattered them on top of the ice cream layer. Then, because David loves PB, I melted peanut butter and 'spread' that on top of the reeses cups. Freeze this next layer for an hour or until toppings and vanilla ice cream are both firm.
4. Repeat step #2 with another flavor of ice cream. I used Rocky Road, per David's request. Even if you choose a flavor with stuff in it, you still need to mix it up good. It will level out on the cake. Once again freeze for 2 hours or until firm.
5. This top layer is also up for your interpretation. David wanted the cake 'iced' in something, so I melted the rest of the frosting and used a plastic baggie to lighting frost the cake. Then I crushed the rest of the oreos and put them on top, with some sprinkles on top for fun! Obviously, store in the freezer, with the lid! =)


mmm, look at those layers!

Enjoy!