Monday, January 9, 2012

Whoopie Pies


I have seen whoopie pies a lot of places lately and I finally got the chance to try them for myself (twice actually!). The recipe I used both times and love is here. Both times I halved the recipe but I made a few tweeks. Both times I used more cocoa powder, just add and try to taste. The second time I had no buttermilk or vinegar to make it and the cakes still turned out great. Also I am just using Hershey's Cocoa Powder.  And I made my own filling mixture both times, a marshmallow and a marshmallow peanut butter!


You will need:
For cakes
  • 2 cups all-purpose flour
  • 1/2 cup Dutch-process cocoa powder
  • 1 1/4 teaspoons baking soda
  • 1 teaspoon salt
  • 1 cup well-shaken buttermilk
  • 1 teaspoon vanilla
  • 1 stick (1/2 cup) unsalted butter, softened
  • 1 cup packed brown sugar
  • 1 large egg
Filling: See below!


For some reason, my camera is being stubborn and I only have a few photos of this. Jump on over to their website for the full instructions.

I used about an inch - inch and a half wide scoop. Any bigger and the pies are too big for a single serving!


They can out perfectly!


Now for the marshmallow creme in the middle:
Approx based on taste:
  • 4 tablespoons melted butter
  • Large jar of Marshmallow Creme (14 oz?)
  • Powdered Sugar
  • vanilla (optional)
  • Splash Milk
I melted the butter first and them added the marshmallow creme and microwaved again for about 30 seconds. Stir together well. Add about a 1/2 to 1 tsp of vanilla (optional) and combine. Now you need to add enough powdered sugar to thicken it, but be sure to taste as you go. You still want to marshmallow taste. Add milk if needed.


I recommend keeping the filling refrigerated until you want to make a pie. It is still pretty squishy and messy. If you make the pies together in advance, you could use the creme in frozen form, and I would keep the cakes in the fridge, to avoid a melty mess. But believe me, the taste is definitely worth the mess. If you want to PB creme just leave me a comment and I will add it! Enjoy!


Tuesday, December 27, 2011

Mom's Chip Dip

This chip dip is ALWAYS a staple for parties or barbecues in my parent's house. It is the easiest chip dip to make and has a surprising ingredient to some. You will need:

  • Cream cheese (2- 8oz packages for average recipe)
  • Onion (dried flakes or fresh)
  • Milk
  • Garlic Powder
  • Salt & pepper

 There is your line-up, I almost like it better with dried onion flakes, but we were all out. If using dried onion, let soak in a little of the milk before adding.

This is so basic and delicious... With the cream cheese at or almost at room temperature, whip it up in a small bowl. When it is getting smooth, add some milk. You want it to be a good thickness to dip chips in without them breaking off! Add in the onion, garlic powder, salt, and pepper to your liking. Eat with regular potato chips or whatever your favorite is!

Enjoy! 


Repurposing Christmas Treats

So I had this revaluation last night while I was trying to go to sleep. i had just been visiting sites about cake pops and was trying to think what I had around the house to make some of my own. I thought about the 'leftover' Chritstmas cake in my fridge, but this morning the idea didn't seem so good...

Until I got to thinking about it... What a wonderful way to repurpose Christmas treats into New Years eats! If your house is anything like mine, that HUGE cake I made specially for Christmas, doesn't usually get eaten much after that day. And I put a lot of time and ingredients into that cake, so I thought why can't I make some cake pops out of it?! And believe it or not this worked out wonderfully for me and has endless possibilities. Uneaten cupcakes, brownies, etc could all be re-worked into fabulous chocolate dipped cake pops!

Okay, so here is the cake. And while it was fabulous on the 25th, I don't know who is going to eat it now. Cut off a portion of it...


...And get to mixing with a hand or stand mixer. This cake was 2 layers of cake, a cheesecake layer and frosting, so it formed a GREAT texture. If using brownies or another dessert, you may need to add cream cheese or some frosting to it.


Look how beautiful! Now get out your scoop. This one was about 3/4 or 1 in in diameter.


Scoop out all your balls onto some wax paper. Place them in the freeze for 5-10 minutes. They will coat in the chocolate much better when frozen.


Here is the chocolate I used, some milk and some white. (I just had 2 Hersheys bags that were almost empty, thats why I used two different kinds for both)


I put mine in a double boiler setting and adding some boiling water. 


Stir that chocolate until it melts and you are ready to dip!


 Of course I had to add some sprinkles and drizzle some chocolate!

Red Velvet Cheesecake Cake Bites! So good! 

 Hoping you can use this little trick to whip up some New Years treats for your family!

Toasted Oatmeal Cinnamon Ice Cream

Ever since my mom and I found the recipe for 'No Machine' ice cream, we have been trying out all kinds of recipes. We have yet to substitute evaporated milk for the heavy cream (I will do this soon), but we have made some good concoctions!

This one uses the basic recipe,

  • 1 can sweetened condensed milk
  • 2 cups heavy cream (1/2 & 1/2 or other substitutes)
  • 1-2 cups oatmeal
  • Ground Cinnamon
  • Vanilla extract


Using the desired amount of oatmeal (more oatmeal makes it more 'chewy' and less creamy) toast the oatmeal in a lightly buttered sauté pan. Stir occasionally to avoid burning. This could also be done in the oven.


Measure out your heavy cream.


Whip the cream (I don't do this step anymore and love the results, and if using a substitute you may not be able to whip it)

Add sweetened condensed milk, the oatmeal, vanilla, and cinnamon. Mix lightly with mixer to combine the SCM and heavy cream well.


Mom used a spoon in the end to avoid over-whipping/mixing.


Now she got a new toy for christmas, this Kitchen Aid ice cream attachment. The bowl is kept in the freezer and you mix the ice cream from 15-25 minutes until it is at soft-serve stage. This cuts the normal waiting time of 6 hours to like 1 hour!  (For normal prep, place in a bowl and freeze after the previous step. It will need 4-6 hours to set properly)


I added some carmel syrup! Mmm! Next time I make this flavor I would like to play around with the amount of oatmeal. ENJOY!

Christmas Dinner

I have something special to share with you! For Christmas in my [parents] house we have an italian dinner, usually ravioli or some type of stuffed pasta. If was a tradition brought down my my father, grandmother and great-grandmother. Now, while I will not be sharing the recipes, I thought I would let you see what a wonderful dinner we had!

The main part of the dinner is what we call 'Banana Macaroni'. This name was affectionately dubbed by my great-grandmother, however it is basically a crepe stuffed with our family ravioli filling. 

Here is the ravioli filling, a mixture of ground beef, spinach, parm. cheese and some spices/herbs.

To cook the crepes, butter a sauté pan slightly. Scoop some of the batter on the pan and let it cover the bottom.


Flip the crepes halfway through, and then you have a stack as you go.


Mmm, here comes the filling. We did an assembly line. My sister scooped the filling and I rolled the macaronis.

Keep rolling...


We made an alfredo pan and a red sauce pan. Cover the bottom of the pan first, layer the macaronis and then cover with more sauce. (Like making enchiladas!) They bake in the oven until hot. And they are delicious! =)


Friday, December 23, 2011

Salt Dough Ornaments

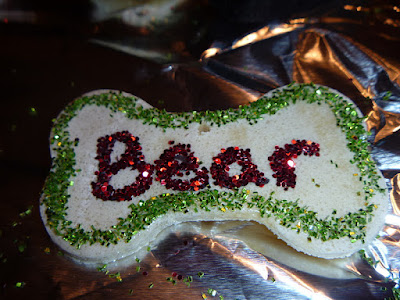
Made this recipe for Salt Dough Ornaments today. They are super easy and pretty cute, because they look like sugar cookies. I just wanted to share some photos of how mine turned out after I decorated them. We are going to try and spray-adhesive them tomorrow to keep the glitter attached and add the string/wire to hang them from Hope you like!