- Styrofoam/floral foam cone in the size of your choice
- Flat head pins or decorative straight pins
- 1 inch by 6in strips of paper (length can vary)
- black/neutral sheet of paper
- ornament
- Scissors or cutter
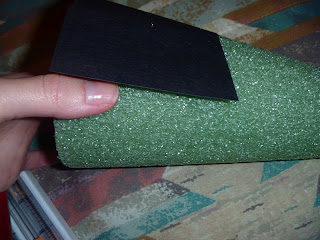
Start off with your foam cone:
I covered the bottom portion with black paper, because part of the bottom showed, and I didn't like how the foam looked. I used plain straight sewing pins.
Use a cutter (or scissors) to get your straight pieces for the branches. My paper was already 4.5 x 6.5 inches, so I just cut them in strips 1 in wide, 6.5 inches long.
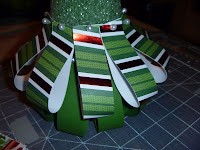
You'll need to bring the bottom edge of the strip to the top, DO NOT CREASE/FOLD, and pin them this way onto the cone. The first row should be placed so it barely touches the ground or bottom of the cone. I used these pins left over from our wedding flowers because they looked nice showing on the tree!
Keep going all the way around the cone for the first row. Keep them at the height, or close.
Repeat these steps again for each new row. Overlap the rows, starting each new row about an inch above the previous. As you go up higher, you can space the rows more if you like.
Here is one finished tree. Mine was made with more fun/whimsical patterns.
Here is the finished tree I made for my mom. Her's was more basic green/red prints. The stars were attached to a stick/wire and we found them at Michaels. They worked perfectly to stick through the middle of the cone and hide the bare top! I also placed a circle of the black paper on top to hide the foam.
These are super easy and can be made in various sizes! I hope you try one out for your holiday decor! <3


No comments:
Post a Comment